
The furniture fitting process is a structured, end-to-end operation that takes your space from bare walls to fully installed, custom-made storage. It begins with a precise site survey and moves through design finalisation, manufacturing, and professional installation. Skilled fitters use techniques like scribing and filler panels to reconcile your furniture with imperfect walls and floors. Understanding how the furniture fitting process works helps you prepare properly, set realistic expectations, and recognise quality craftsmanship when you see it. Whether you are planning fitted wardrobes or a full room of bespoke storage, the process follows a clear and logical sequence.
What are the key steps in the furniture fitting process from design to delivery?
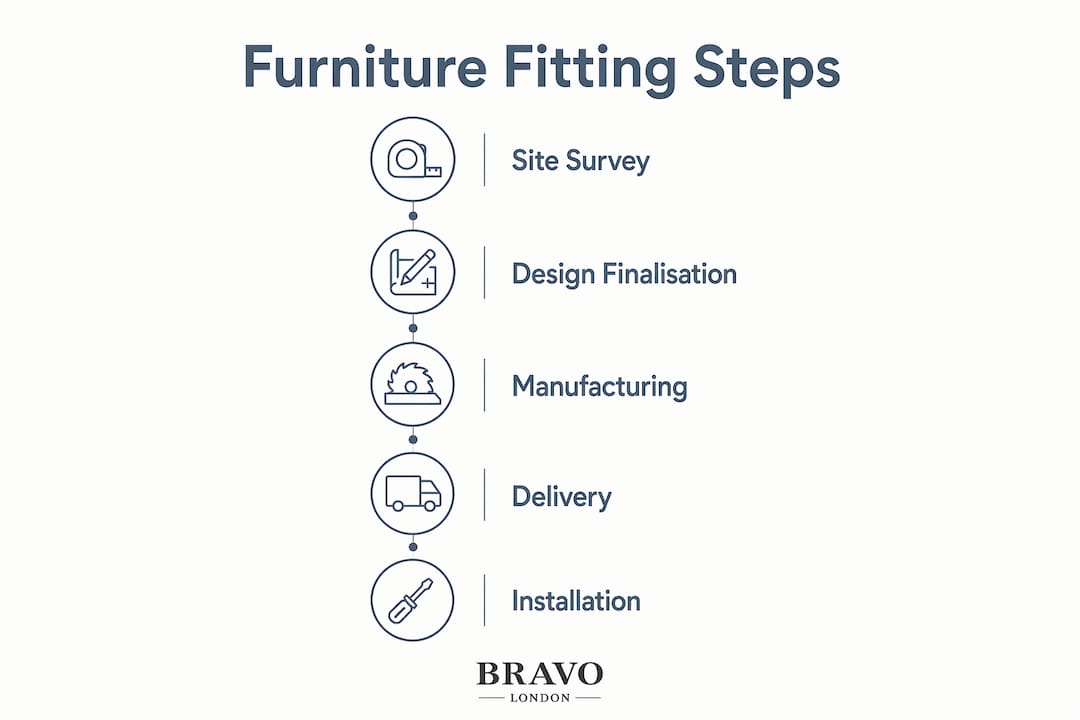
The furniture fitting process follows four core stages: site survey, design finalisation, manufacturing, and delivery. Each stage feeds directly into the next, and a mistake at any point creates problems downstream.
1. Site survey and precise measurement
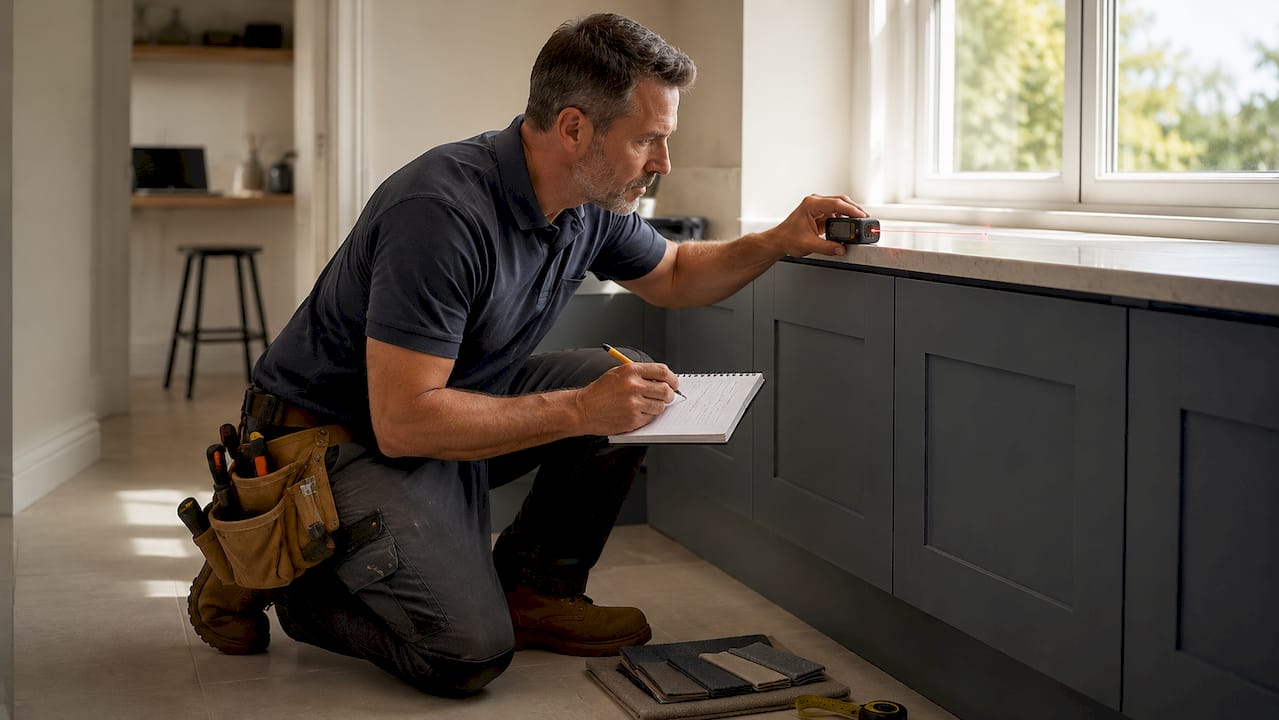
A professional fitter visits your home to measure the space in full. This is not a quick tape-measure job. Fitters record ceiling heights, floor levels, wall angles, and the positions of sockets, radiators, and pipework. These measurements form the technical brief for your design.
2. Design finalisation
Once measurements are confirmed, the design is refined to account for both your preferences and the physical constraints of the room. This stage covers material choices, internal configurations such as rails, shelves, and soft-close drawers, and the placement of scribe or filler panels. If you are choosing between a corner fitted wardrobe and a straight run, this is when that decision is locked in.
3. Manufacturing and quality control
Components are cut, edged, and assembled in a factory environment. Manufacturers inspect panel accuracy, edge banding adhesion, and hardware operation before anything leaves the workshop. This pre-delivery check reduces on-site problems significantly.
4. Scheduling, delivery, and site access
Delivery is coordinated around your availability and site access. Fitters confirm that doorways, staircases, and corridors can accommodate the panels. Large or complex pieces may require partial assembly on-site.
Pro Tip: Ask your fitter for a dimensioned drawing before manufacturing begins. Reviewing it carefully at this stage costs nothing. Changing a shelf position after the panels are cut does.
How do installers handle irregularities and on-site adjustments?
No room is perfectly square. Walls bow, floors slope, and corners rarely meet at a true 90 degrees. Professional fitters address this through two distinct techniques: scribe panels and filler panels.
Scribe panels vs filler panels
Scribe panels and filler panels serve different purposes, and confusing them is a common mistake.
| Panel type | Purpose | When it is used |
|---|---|---|
| Scribe panel | Closes uneven gaps between cabinet and wall | Where walls are irregular or bowed |
| Filler panel | Creates planned spacing between cabinet and wall | Where clearance is needed for function or aesthetics |
A scribe panel is trimmed on-site to follow the exact profile of the wall. A filler panel is a fixed, pre-cut piece that maintains a deliberate gap, for example, beside a door frame or at the end of a run.
The fitting sequence for irregularities
The on-site scribe process follows a specific order:
- Position the cabinet plumb and level, regardless of the wall or floor behind it
- Hold the scribe panel against the wall and mark the wall's profile onto its edge using a compass or scribing tool
- Trim the panel along the marked line with a jigsaw or hand plane
- Fix the trimmed panel to close the gap cleanly
Levelling the carcass first is non-negotiable. If you trim to an unlevel cabinet, every door and drawer will hang at an angle.
Pro Tip: Scribing is integrated into the installation sequence, not added afterwards. It reconciles the furniture and the room simultaneously. Treating it as a finishing touch is the most common amateur mistake.
What should you expect on installation day?
A standard built-in wardrobe installation takes 3–6 hours on-site. More complex projects, or those requiring the removal of existing furniture, can run to two full days. Knowing the sequence helps you plan your day.
1. Arrival and site review
Fitters arrive and walk the space to confirm that measurements match the delivered components. Any discrepancy is flagged before a single panel is fixed.
2. Protection setup
Flooring and any remaining furniture are protected with dust sheets and board. This is standard practice, not optional.
3. Removal of existing furniture
If old wardrobes or shelving need to come out, removing existing wardrobes adds 1–2 hours to the job. Walls may need patching before new carcasses go in.
4. Carcass assembly and fixing
Carcasses are assembled, levelled, and fixed to the wall. This is the structural core of the installation. Every subsequent step depends on the carcasses being plumb and square.
5. Internal fittings
Rails, shelves, drawer boxes, and internal organisers are fitted once the carcasses are secure. This is also when integrated lighting is routed if specified.
6. Door hanging and adjustment
Doors are hung and adjusted for alignment, soft-close action, and gap consistency. Door and drawer alignment is a core task, not a cosmetic afterthought. Residual floor or wall irregularities that were not fully resolved during carcass levelling will show up here.
7. Final inspection and client walkthrough
The fitter walks you through the completed installation. You check every door, drawer, and shelf. Any adjustment is made before the team leaves.
What role do electrical and building regulations play in fitted furniture installation?
Electrical compliance is not optional when fitted furniture includes integrated lighting, charging points, or powered mechanisms. The rules tightened significantly in 2026.
BS 7671 Amendment 4 (2026) is effective from october 2026 and governs all low-voltage electrical installations in the UK. It formalises requirements for systems like integrated wardrobe lighting and affects both the planning and on-site execution of any fitted furniture project that includes electrical work.
Key compliance considerations include:
- All electrical work behind or within fitted furniture must meet BS 7671 Amendment 4 standards
- Integrated battery systems and LED drivers require adequate ventilation to manage heat and reduce fire risk
- Any new socket or lighting circuit added during a fitting must be notified to your local building control authority under Part P of the Building Regulations
- Only a qualified electrician should carry out or certify electrical work within a fitted furniture installation
These requirements affect the planning stage, not just the installation day. If you want integrated lighting in a fitted walk-in wardrobe, the electrical specification must be confirmed before manufacturing begins.
How does proper installation affect furniture longevity?
A well-installed piece of fitted furniture lasts decades. A poorly installed one shows problems within months. The difference comes down to three factors: levelling, door and drawer adjustment, and installation sequence.
Levelling the carcass correctly at the start prevents every downstream problem. Doors that rub, drawers that stick, and panels that bow are almost always symptoms of a carcass that was not set plumb and square from the beginning.
Door alignment and mechanism testing after carcass installation is a critical step. Adjusting hinge positions and soft-close mechanisms at this stage prevents operational failures that worsen over time as the furniture settles.
Installation sequence also matters more than most homeowners realise. Fitting wardrobes onto solid subfloors before carpet replacement gives the carcass a stable, non-compressible base. It also produces neater carpet edges around plinths. Placing heavy carcasses on thick carpet introduces movement and instability over time.
- Level carcasses before fixing to walls
- Adjust doors and drawers before the client walkthrough, not after
- Install on subfloor, then lay carpet around the plinths
- Test every mechanism fully before signing off the job
Pro Tip: Ask your installer whether they plan to fit before or after your new carpet goes down. If they say after, that is a warning sign. The correct answer is always before.
Key takeaways
The furniture fitting process works best when measurement, manufacturing, and installation are treated as a single connected sequence, not three separate jobs.
| Point | Details |
|---|---|
| Measurement drives everything | Errors at the survey stage compound through every subsequent step. |
| Scribe and filler panels are different | Scribe panels close irregular gaps; filler panels create planned spacing for function or aesthetics. |
| Installation day has a fixed sequence | Carcass levelling must come before door hanging, which must come before the client walkthrough. |
| Electrical compliance is mandatory | BS 7671 Amendment 4 (2026) applies to all integrated lighting and electrical work within fitted furniture. |
| Install before carpet, not after | Fitting on a solid subfloor improves long-term stability and produces cleaner carpet edges. |
What I have learnt from over 1,000 fitted furniture projects
The most common problem Bravo London encounters on complex projects is not a technical one. It is a communication gap between what the homeowner imagined and what was confirmed in writing before manufacturing began. A beautiful design brief that was never translated into a signed-off dimensioned drawing leads to expensive changes.
The second most common issue is homeowners who clear the room incompletely. Fitters need clear, unobstructed access to every wall. Leaving a bed or a chest of drawers in the middle of the room adds time and creates risk of damage.
On the technical side, the detail that surprises most homeowners is how much of the final appearance depends on the scribing work rather than the furniture itself. A perfectly manufactured wardrobe can look poor against a badly scribed wall. The reverse is also true. A modest specification, scribed and fitted with care, looks considered and intentional.
The practical advice Bravo London gives every client before installation day is simple. Empty the room fully. Confirm the electrical specification in writing. And if new carpet is planned, schedule it after the furniture is in. These three steps resolve the majority of on-site complications before they arise.
— Bravo
Bespoke fitted furniture by Bravo London
Bravo London designs and manufactures bespoke fitted wardrobes and custom storage for homeowners across London, with over 1,000 completed projects and a 10-year warranty on every installation. Every project begins with a detailed site survey and ends with a full client walkthrough.

All electrical work within Bravo London installations is specified and executed in line with BS 7671 Amendment 4 (2026). If you are ready to move from design to delivery, the bespoke furniture service covers everything from initial measurements through to the final adjustment of your doors and drawers. You can also read more about what happens after your design is confirmed to understand exactly what to expect at each stage.
FAQ
What is furniture fitting?
Furniture fitting is the professional process of measuring, manufacturing, and installing custom-built furniture that is fixed to the walls, floor, or ceiling of a specific room. It differs from freestanding furniture because each piece is made to the exact dimensions of your space.
How long does a fitted wardrobe installation take?
A standard built-in wardrobe installation takes 3–6 hours. Removing existing wardrobes beforehand adds 1–2 hours, and more complex projects can take up to two full days.
What are scribe panels used for in furniture fitting?
Scribe panels are trimmed on-site to follow the profile of an uneven wall, closing the gap between the cabinet edge and the wall surface. They are distinct from filler panels, which create a planned, fixed spacing for functional or aesthetic reasons.
Do I need an electrician for fitted furniture with integrated lighting?
Yes. Any electrical work within fitted furniture must comply with BS 7671 Amendment 4 (2026) and, where it involves new circuits, must be notified under Part P of the Building Regulations. A qualified electrician must carry out or certify this work.
Should fitted wardrobes be installed before or after new carpet?
Fitted wardrobes should always be installed before new carpet is laid. Fitting onto a solid subfloor provides a stable, non-compressible base and produces neater carpet edges around the plinths.